
SIMPLE SHORTCUTS & SECRETS
Photo Editing Made Easy
For busy wedding & portrait photographers so you can close that laptop sooner.
Consistent Edits with this Easy Tip
Imagine pulling up to a drive-thru where everyone recognizes you.
This happens to me all the time, and I love it! It feels like being popular, but without all the drama. 😎
Who does this?
For me, it’s McDonald’s, all because of my go-to Mocha Frappe.
You see, I started ordering on their app. Usually the same warm friendly woman at the window will say, “You have a good day, Erika!”
For someone who works online who barely has any social interaction during the week, this is one of my favorite things about my trips to McDonald’s (usually 1-3 times a week depending on my caffeine needs😋).
Of course, I’ve used the app on a consistent basis for a few months at this point so the regular cashier recognizes me when I come through for my Mocha Frappe.
(The Mocha Frappe is seriously delicious! If you haven’t tried it yet, you’re missing out.)
Just like how consistency at McDonald’s creates that familiar, trusted experience, consistency in your photo editing will help you deliver a gallery your clients will love. Let me show you an easy way to ensure consistency when you're editing your photos.
Your Weekly Photo Editing Tip
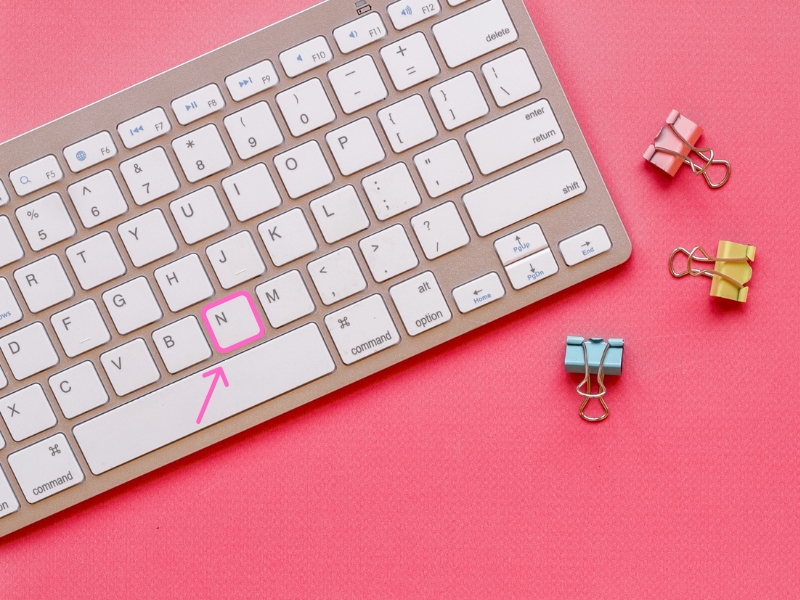
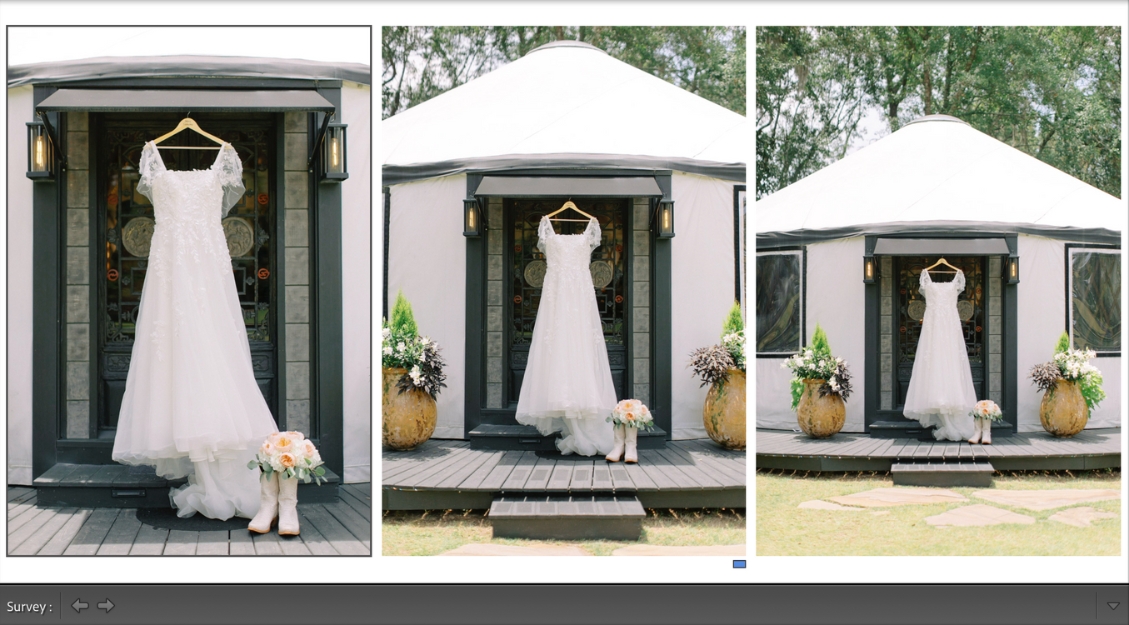
As a private photo editor, I have several ways to monitor the consistency of my edits. One of them is to use something in Lightroom called “Survey View.” This is where you can view a selection of photos together on your screen without the image info that you see in the Library Grid.
It’s extremely helpful when you want your images to look consistent and I use it every day when editing for my clients. I didn’t know this existed in Lightroom when I first started so I wanted to share it with you.
And of course, this one has a keyboard shortcut, yay! 🤓
Step 1
Select a range of photos from either the Library Grid or from the Film Strip if you are in the Develop module.
Step 2
Tap the “N” key on your keyboard. Tada! There are your images together with white space around them. You’ll see a thin black border around the current active photo and you can see stars and color labels under each as well if those are applied.
Step 3
Seeing the photos in this way helps to see inconsistencies with exposure and white balance that you may not notice in Reference View.
I use this when I’m in the Develop module and I’ve finished editing a section. I include the photographer’s anchor image (reference image) in the selection to be sure I’m matching their edit.
Step 4
To go back the Library Grid, tap the “G” key on your keyboard. Or if you want to return to the Develop module, tap the “D” key.
Keyboard shortcuts are super useful, aren’t they? I think so and I hope you do too.
Happy editing,
Erika

Check Out the Newest Posts
Hey there photographer!

I'm Erika. I'm a private photo editor for wedding photographers and photo editing educator. Think of me as your techy friend who loves figuring out the shortcuts in Lightroom Classic so you don't have to.


Blog Categories


(Affiliate Code)


Online private photo editor based in Cleveland, Tennessee, serving wedding photographers worldwide.
Services
Color Correction
Style Matching
Lightroom Classic Retouching
Image Culling

Copyright © 2020-2026 Erika Swafford. All Rights Reserved
Created with Systeme.io