
SIMPLE SHORTCUTS & SECRETS
Photo Editing Made Easy
For busy wedding & portrait photographers so you can close that laptop sooner.
Fix Skin Tones in Lightroom Classic Fast

I’m sure you know skin tones are SO important with wedding and portrait photography. And I know you sometimes run into things like fake tans that look too orange, red undertones that look too dark, or difficult lighting that has a colorcast or drains the color out of the skin.
What can you do?
As a private photo editor, I’d say Lightroom’s HSL panel is your easiest tool to get fix skin tones—fast.
Skin Tones in Lightroom Classic
Skin tones usually fall in the orange range in the HSL panel. Different factors—like lighting, makeup, and tanning products—can affect how skin appears in your images. Common issues you might run into:
Skin looking too dark or dull in certain lighting.
Overly bright or washed-out skin after exposure adjustments.
The dreaded orange glow from self-tanners.
Luckily, Lightroom makes it easy to fix all of these with just a few simple tweaks!
Step-by-Step Guide: Fixing Skin Tones with the HSL Panel
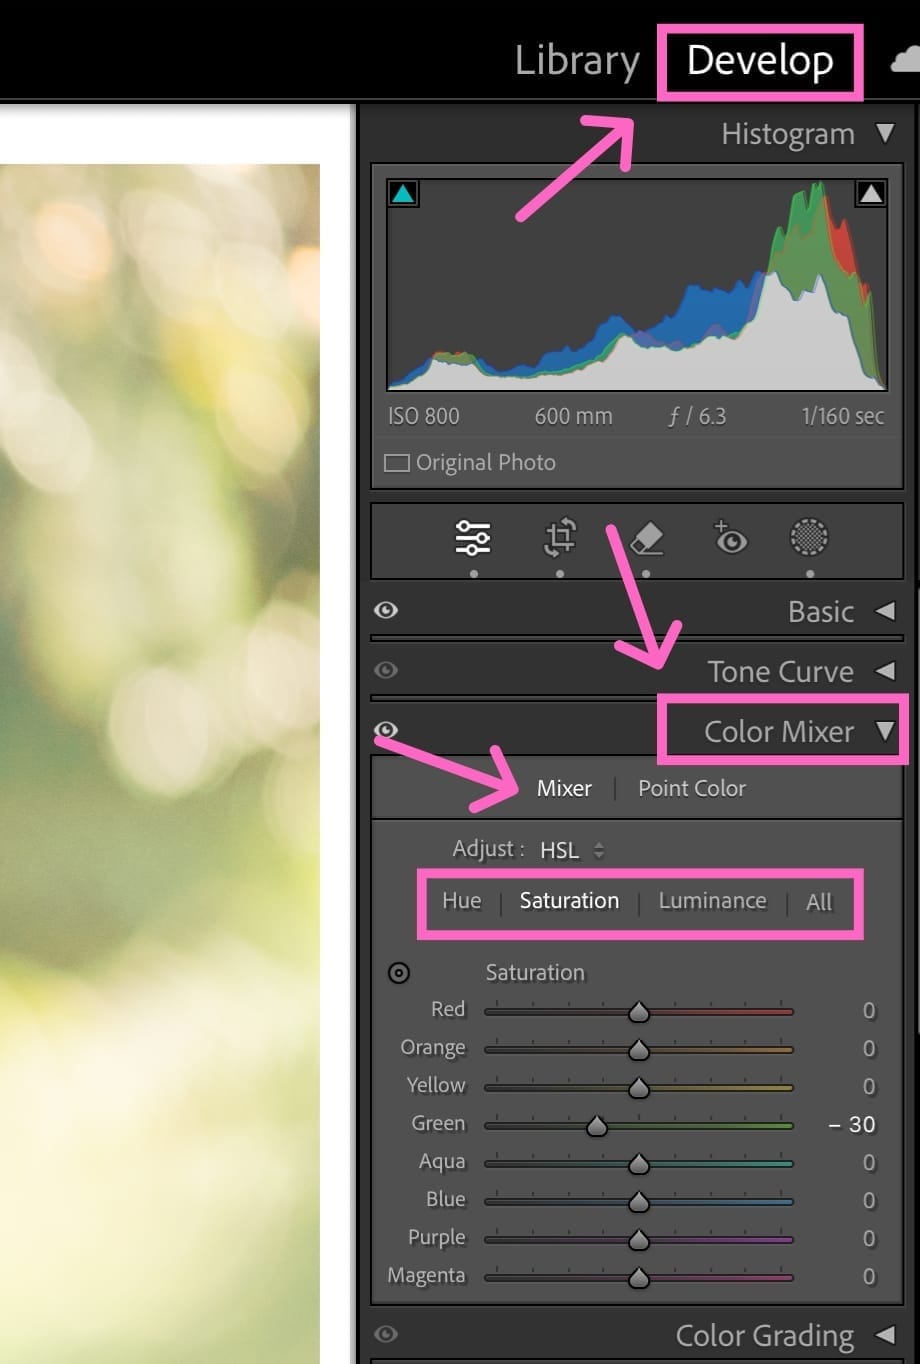
1. Find the HSL Panel
Head to the Develop module in Lightroom Classic.
Scroll down to find the Color Mixer (it’ll be a panel under the Basic panel).
Select Mixer, so you can adjust Hue, Saturation, and Luminance separately.
If you click on ALL at the end it will show all three HSL panels at once.
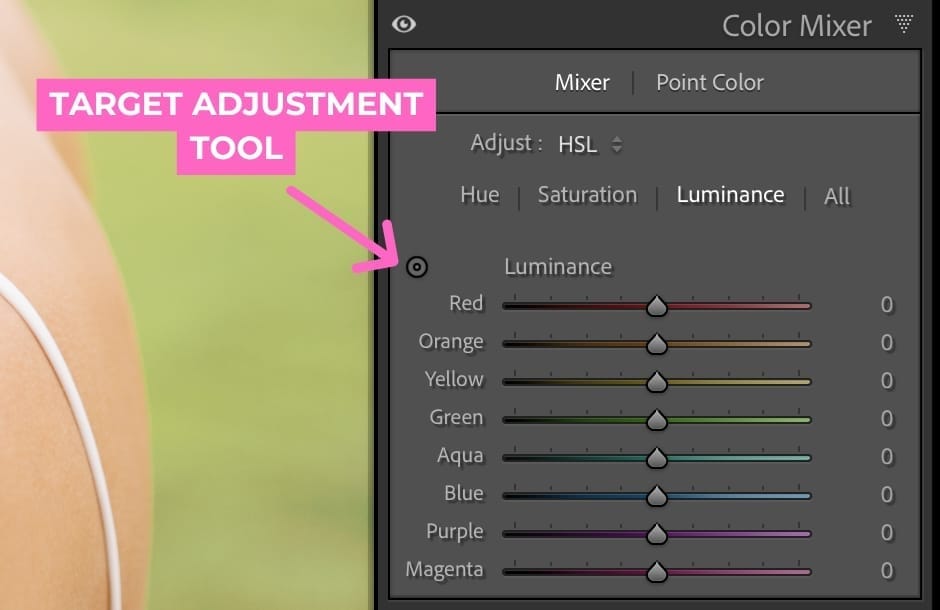
2. Brighten Skin with the Orange Luminance Slider
Increase Orange Luminance (+5 to +20) to brighten skin and create a soft, healthy glow.
Decrease Orange Luminance (-5 to -15) if skin looks too light and lacks depth.
Use the Targeted Adjustment Tool (the small circle icon in the HSL panel) to click directly on the skin in your image and then drag it up or down to adjust the strength of the luminance.
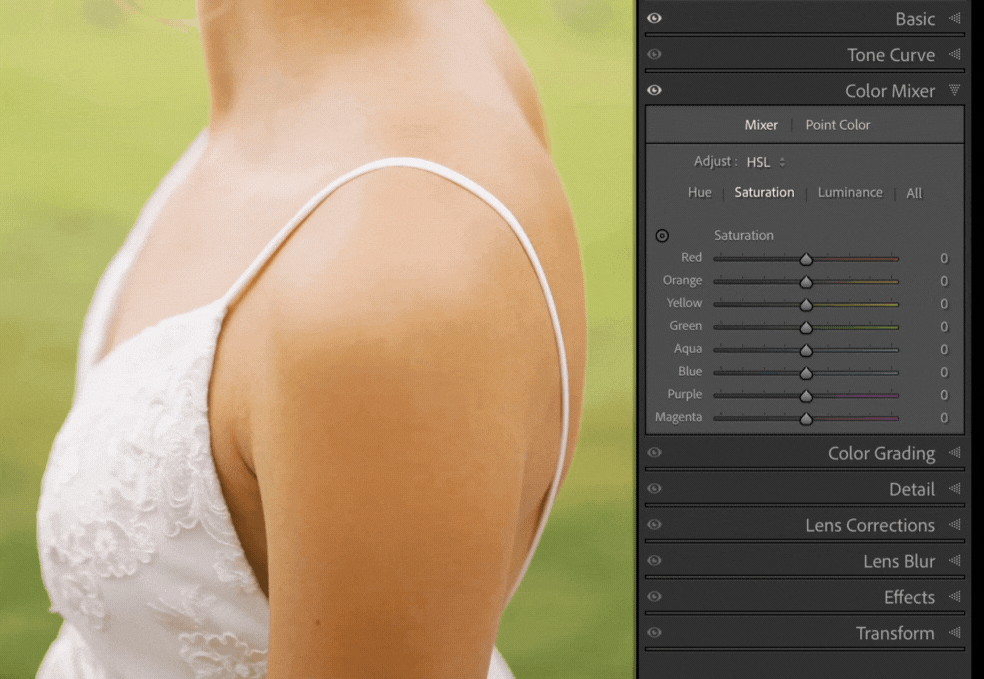
3. Fix Overly Orange Skin from Fake Tans
Reduce Orange Saturation slightly to tone down intense warmth.
If needed, adjust Orange Hue slightly left (for a more red tone) or right (for a more yellow tone) until the skin looks more natural.
Be subtle! Too much desaturation can make skin look gray or lifeless.
Bonus Tips for Consistent Skin Tones
Batch edit to sync skin tone adjustments across multiple images—be sure the HSL panel box is checked in the Sync dialog box settings.
Use Presets with subtle skin tone corrections to speed up your workflow. You can even create your own—that’s what I do with a gallery that has tricky skin tones.
Use masks to isolate skin tones when colors in the image are being affected negatively. Lightroom Classic even has AI masks so you can select just the skin—so helpful and a huge time saver!
Let’s Wrap It Up
So a few quick tweaks in the HSL panel can make all the difference in achieving amazing, glowing skin tones. Whether you’re brightening up a face or fixing an intense tan, these HSL edits help you get natural results—without over-processing.
Try this the next time you're in Lightroom Classic to play with it yourself!
Want to save even more time editing?
Check out my free mini-workshop "Shoot to Edit Less" to learn how to cut your editing time by using a few simple shooting strategies!
Happy editing,
Erika

Check Out the Newest Posts
Hey there photographer!

I'm Erika. I'm a private photo editor for wedding photographers and photo editing educator. Think of me as your techy friend who loves figuring out the shortcuts in Lightroom Classic so you don't have to.


Blog Categories


(Affiliate Code)


Online private photo editor based in Cleveland, Tennessee, serving wedding photographers worldwide.
Services
Color Correction
Style Matching
Lightroom Classic Retouching
Image Culling

Copyright © 2020-2026 Erika Swafford. All Rights Reserved
Created with Systeme.io