
SIMPLE SHORTCUTS & SECRETS
Photo Editing Made Easy
For busy wedding & portrait photographers so you can close that laptop sooner.
How to Create Your Own Brush Preset in 3 Easy Steps
Salad, no lettuce.
This used to be my go-to salad to make for lunch when I worked a corporate job.
Why no lettuce? Two reasons:
One, I wasn’t into lettuce at the time. I go through phases with food sometimes.
Two, lettuce gets soggy if it sits with chopped tomatoes and salad dressing. Gross!
I found salad was still salad without the lettuce. Just tomatoes, carrots, olives and some Italian cheese with some Italian dressing. *chef’s kiss*
And best of all, I could assemble multiple salads at once so they were grab-and-go for the week.
Oh yeah, I was super proud of myself for that lunch hack.
Wanna know what’s better than bulk prep salads that aren’t mushy?
Yup, creating your own brush presets in Lightroom.
It’s like prepping a salad once and copying it over and over with one button. (Man, wouldn’t that be cool!)
Let me show you how…
Your Weekly Photo Editing Tip
Creating a brush from an existing mask/brush is SO EASY—and it speeds up your editing too! I use this all the time when editing for my clients.
Creating your own brush preset is helpful when you have brushwork/masking that you will need to do on multiple images for the same thing.
For example, if you want to add a little bit of skin smoothing or to bring out the sparkle of an engagement ring diamond to a series of photos with the same lighting.
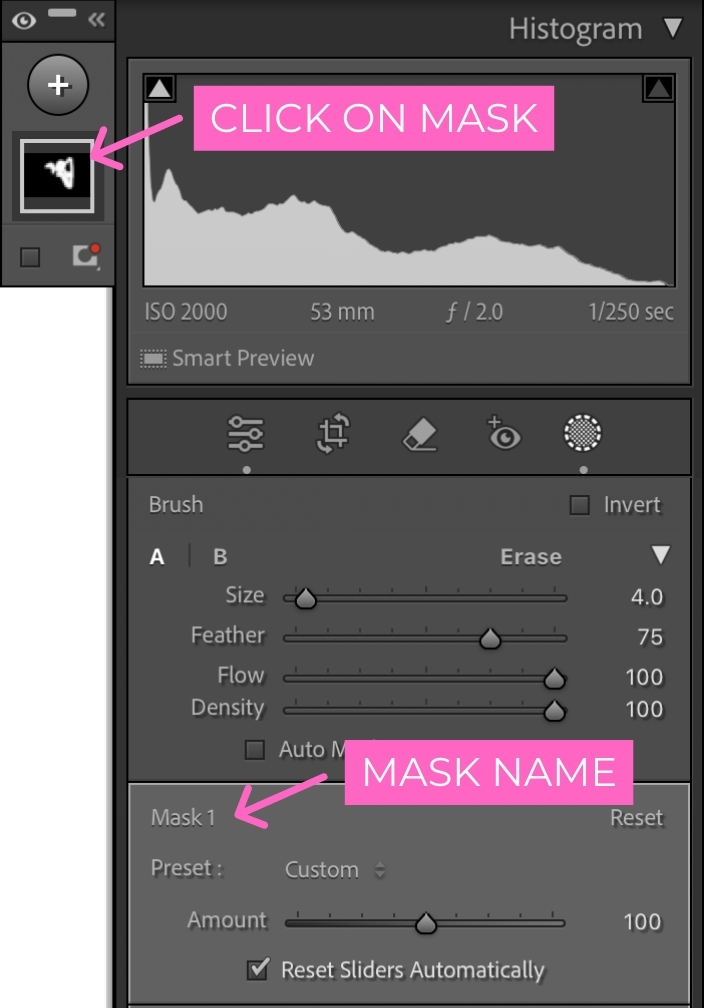
Step 1:
On the image that has the brush/mask settings you want to use, tap on the Masking button or hit shift W on your keyboard. Choose the mask you want by clicking on it in the mask list.
Be sure the mask is selected by seeing if you see the mask/brush name in the upper left corner. (If it says "no mask selected" then try selecting the mask again.)
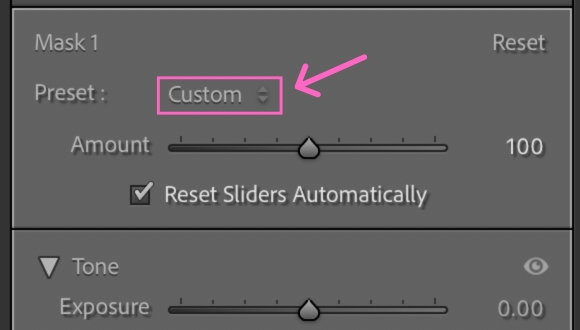
Step 2:
In the mask panel on the right, look for the word “custom” at the top. Press on it with your cursor and a pull down menu appears.
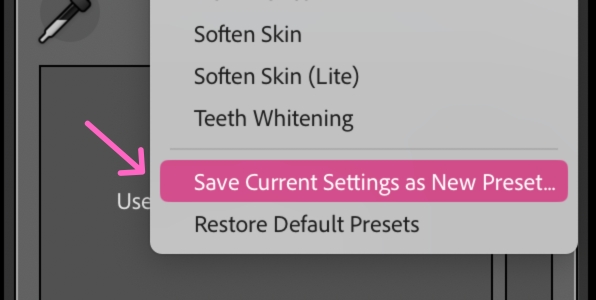
Scroll all the way down to the bottom and choose “Save Current Settings as New Preset”.
Step 3:
Name your brush. You should see it in the list of brush presets close to the bottom of the list.
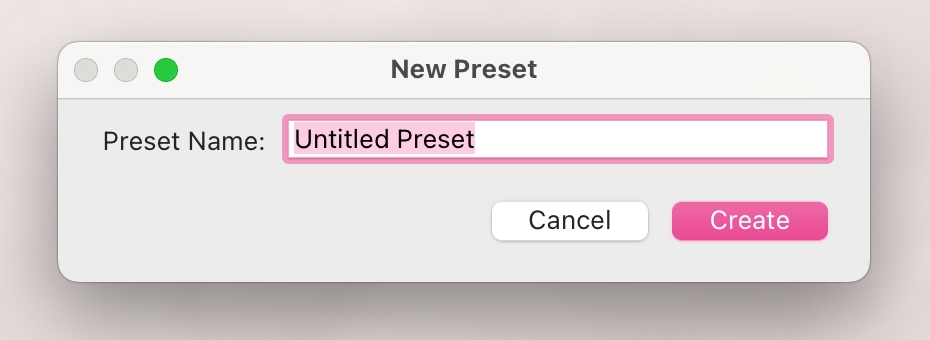
Go to the next image that you want to use the saved brush/mask settings on. Choose your brush from the list by tapping "custom" again and voila! 🙌🏻
When you have a series of photos that need the same brush/masking where you need to custom apply it (instead of using the AI masks), this is the trick that will make it so much easier and faster.
Happy editing,
Erika

Check Out the Newest Posts
Hey there photographer!

I'm Erika. I'm a private photo editor for wedding photographers and photo editing educator. Think of me as your techy friend who loves figuring out the shortcuts in Lightroom Classic so you don't have to.


Blog Categories


(Affiliate Code)


Online private photo editor based in Cleveland, Tennessee, serving wedding photographers worldwide.
Services
Color Correction
Style Matching
Lightroom Classic Retouching
Image Culling

Copyright © 2020-2026 Erika Swafford. All Rights Reserved
Created with Systeme.io