
SIMPLE SHORTCUTS & SECRETS
Photo Editing Made Easy
For busy wedding & portrait photographers so you can close that laptop sooner.
How to Create a Preset from a Profile in Lightroom Classic (Step-by-Step)

Are you using Profiles in Lightroom Classic for your photo editing? Profiles like The Archetype Process and other popular profiles can really elevate your editing.
The cool thing is you can turn your favorite profiles into presets so you get the beautiful colors of a profile plus the functionality of a preset that can save you more time when your editing—especially those marathon editing sessions during wedding season.
Let me show you how to create a preset from a profile so you can apply it to your images faster and more consistently. You’ll feel so smart when you do this!
Profiles vs. Presets: Quick Refresher
Profiles set how the colors look by default when you apply them to your images. Think of them as the starting point for color and tone. And they do this without moving your sliders—it’s all done mysteriously in the background.
Presets, on the other hand, can move sliders and more. They’re saved editing settings that you can apply in one click.
By turning your favorite profile into a preset, you can more quickly apply a profile and have the extra functionality you get with presets that aren’t available with profiles. (More on that later.)
But first, here’s the step-by-step on how to create a preset from a profile.
Step 1 – Apply Your Desired Profile
➜ Select an image to apply your profile to in the Develop Module.
➜ Head to the Basic Panel on the right-hand side of your screen.
➜ At the top, in the “Profile” section, click the four-square grid to browse your options.
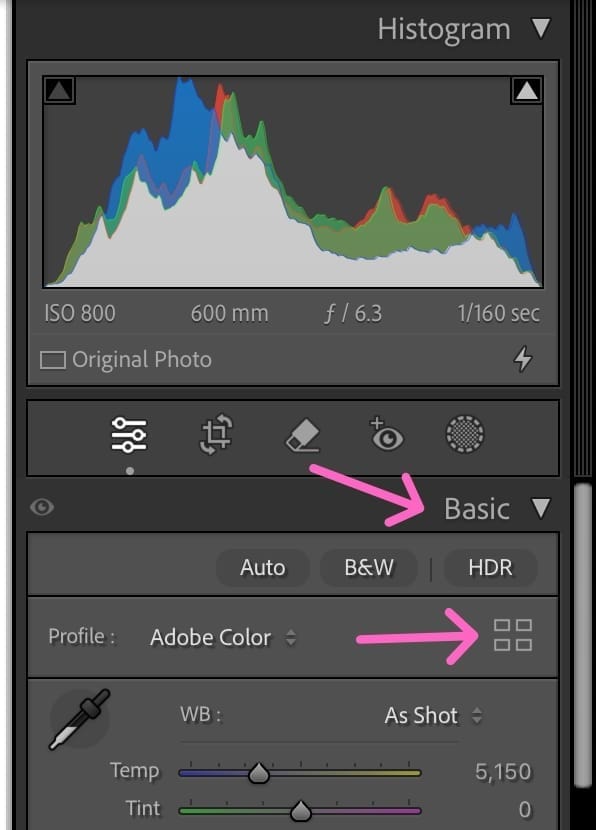
➜ Choose the profile you want to make a preset for.
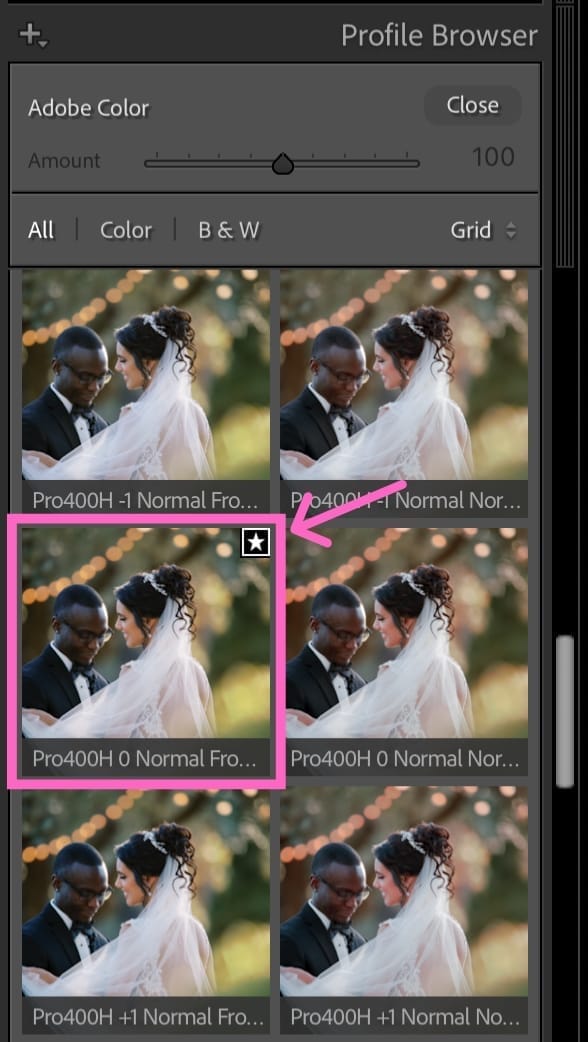
⭐️ Quick tip: If you use certain profiles often, hit the star icon to add them to your Favorites. That way, they show up in the drop-down menu and are easy to access every time.
Step 2 – Customize Your Settings (Optional)
If you are always making the same color or tone tweaks to your profile, you may want to go ahead and make them now before creating the preset.
Just keep in mind which settings you changed so we can add them in the next step.
Step 3 – Save as a New Preset
Now let’s lock it in:
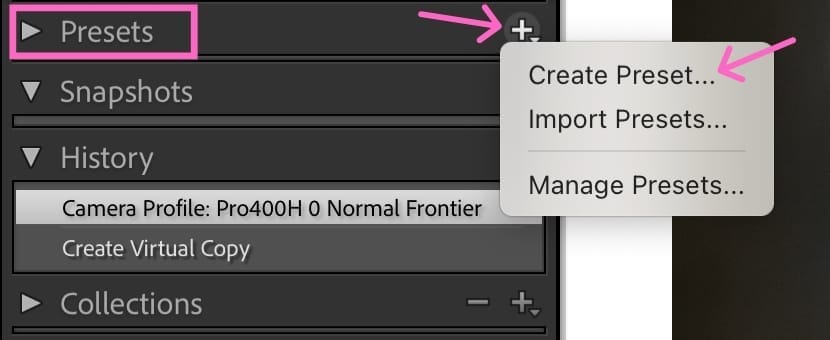
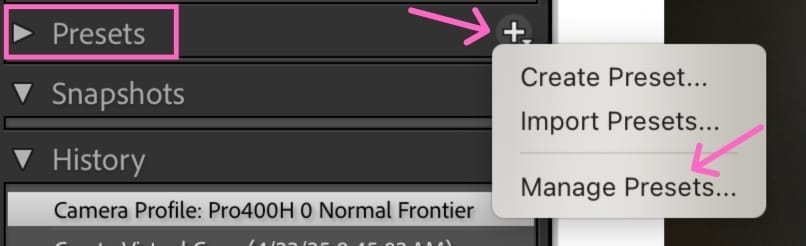
➜ In the Presets Panel that is on the left side of your screen, click the + icon and choose Create Preset.
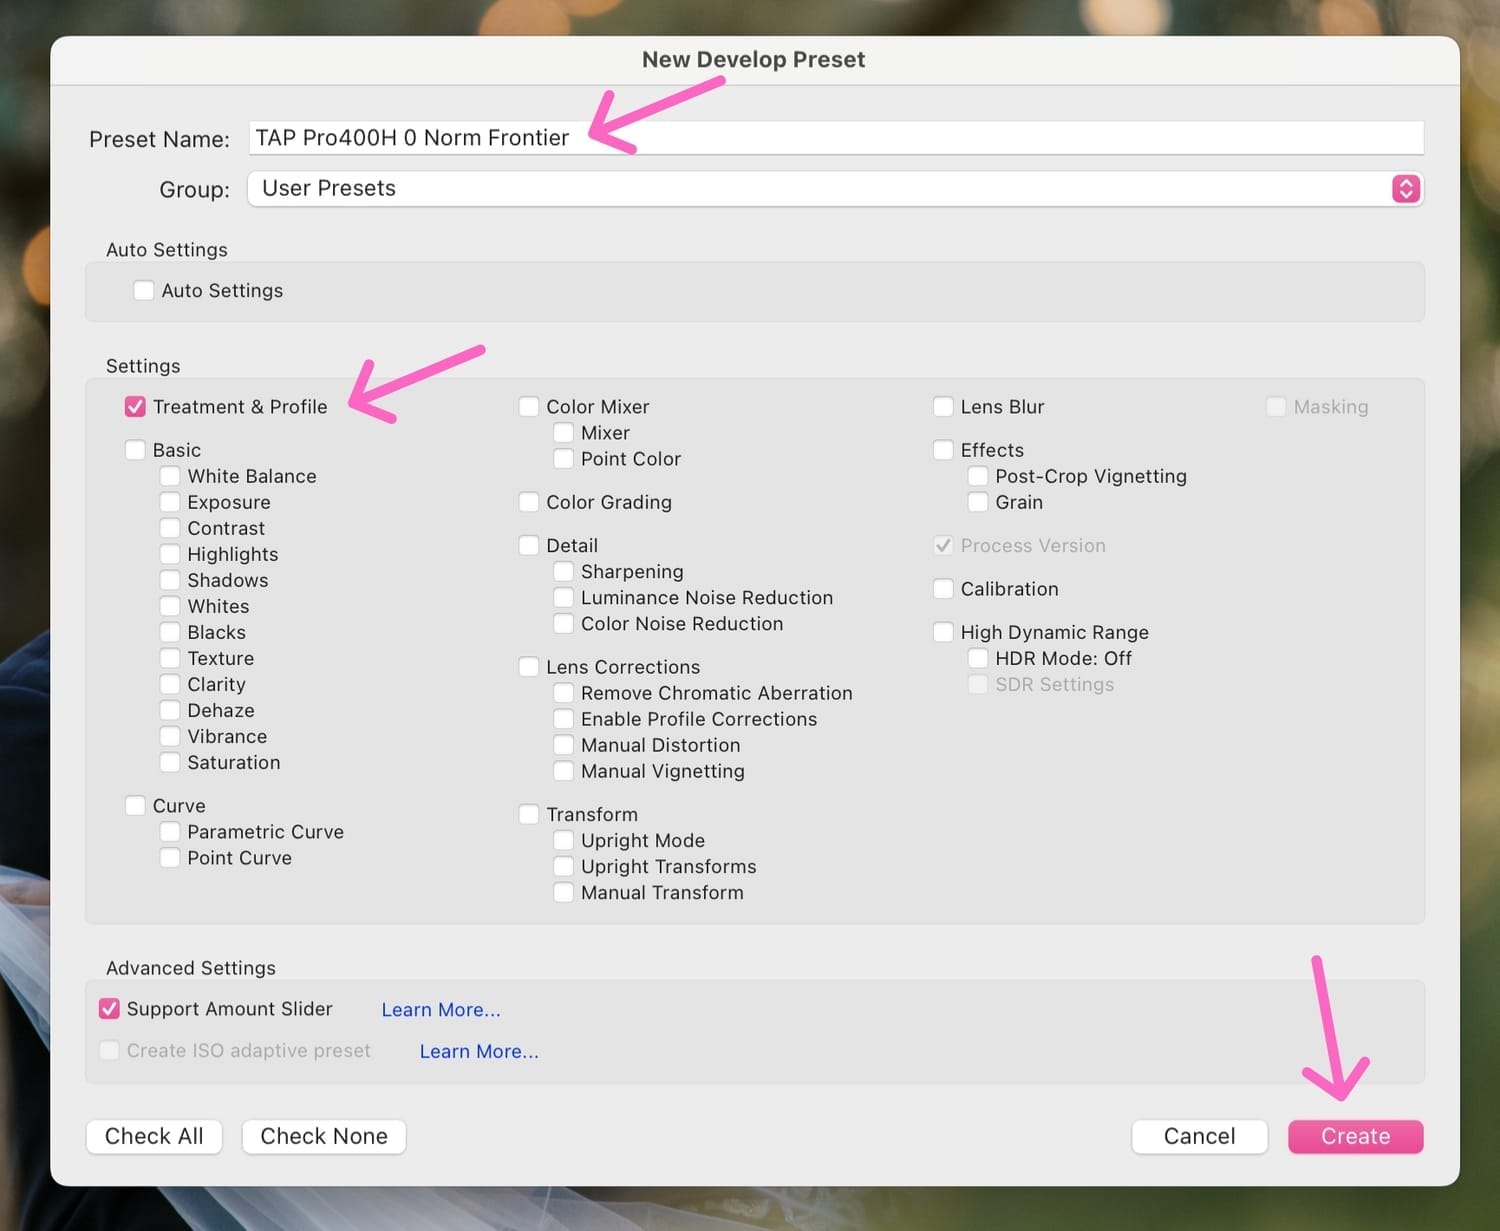
➜ In the box that comes up, give your preset a name that makes sense to you.
➜ You can choose a Group or make a new group to keep your presets organized. If not, you can leave it at “User Presets.”
➜ Check only the “Treatment & Profile” box unless you tweaked your profile. Leave the “Support Amount Slider” checked (which it should do automatically).
➜ If you made additional edits, check the boxes for those settings too.
➜ Hit Create—and boom, it’s saved!
Bonus Tip – Organize Your Presets for Easy Access
Creating your presets is one thing—finding them again is another. Here’s how to keep them organized so you can find them faster:
➜ Use preset groups (you can create them when you create your preset).

➜ Add numbers or short tags to your preset names to group them visually.
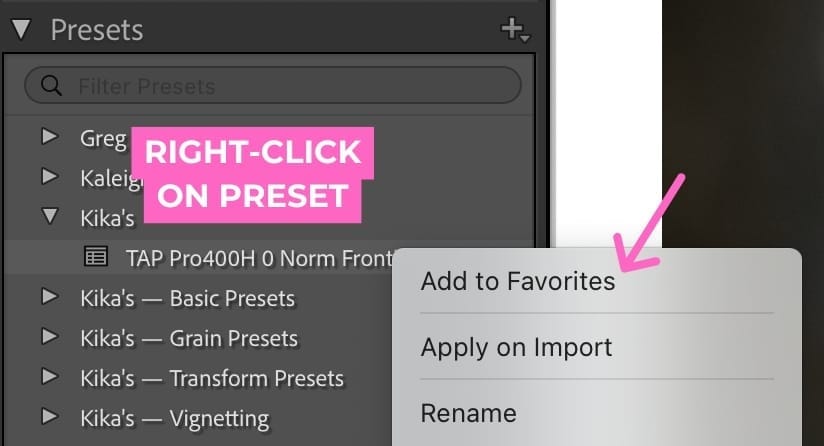
➜ Keep your everyday go-to presets as Favorites so they stay at the top. (Right-click on the preset and click on "Add to Favorites")
➜ You can organize your presets by using “Manage Presets” to check or uncheck presets you want to see in the Presets list.
Bonus Tip – Apply Your New Preset Fast
Want to speed things up even more?
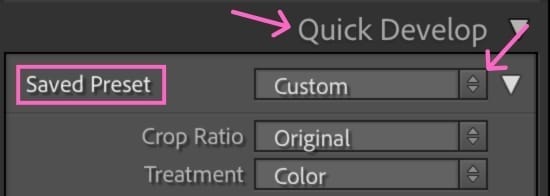
➜ Apply a preset in the Library Grid by selecting multiple images, then clicking your preset from the Quick Develop panel.
➜ Apply a preset on import so Lightroom handles it for you as your files are added. Check out the blog post about how to do that below:
Read more about this topic:
Apply a preset on import and more!
Check out this blog post:
Creating a preset from your favorite profile can help you edit faster and easier. Give it a try the next time you’re in Lightroom!
Want more editing shortcuts like this? Sign up for my free mini-workshop, Shoot to Edit Less—and learn how to save time editing just by making a few simple tweaks while shooting.
Happy editing,
Erika

Check Out the Newest Posts
Hey there photographer!

I'm Erika. I'm a private photo editor for wedding photographers and photo editing educator. Think of me as your techy friend who loves figuring out the shortcuts in Lightroom Classic so you don't have to.


Blog Categories


(Affiliate Code)


Online private photo editor based in Cleveland, Tennessee, serving wedding photographers worldwide.
Services
Color Correction
Style Matching
Lightroom Classic Retouching
Image Culling

Copyright © 2020-2026 Erika Swafford. All Rights Reserved
Created with Systeme.io